
Hot Process Soap: How to Layer Two Colors Together, Just Like Cold Process! Beautiful!
I love making my own soap! You can find out my main reason in this article about Toxins that Lurk in Commercial Soap, but besides that, there are so many more---mainly having to do with just enjoying the creative process. There's a LOT of leeway with ingredients, scent combinations, and natural herbs, clays, and spices you can use for coloring! Making your own soap is seriously a creativity blast! Well, I think so, anyway.
Now, my soap making is nowhere near perfect. It's a process, and I'm learning. I know I will always be learning, actually. I'm not a chemist, and I have an admittedly superficial understanding (and interest) of the chemistry of saponification. All that really matters to me is that I can make homemade soaps that lather incredibly well, smell amazing, and are great for my skin!
Recently, I have found myself in a REAL soap making rut, though. Same old recipe. Same variations. Ho-Hum. I discovered this rut after being asked some really great questions by readers! So, thank you for the comments and questions, friends! I appreciate you!
What does a girl do when she finds herself in a rut?
Do something different, right? Even if it doesn't work....you will at least no longer be doing that same-old, same-old!
Therefore. I have challenged myself to try all new soap recipes for the next month. So far, I've tried three. I honestly have to say that I STILL love my basic soap recipe best. I have not found a natural soap anywhere that can hold a candle to that recipe (yet)....but darn it! I'm going to try! Number one, because I'm breaking out of that soap making rut...and number two, because I know there must be a soap recipe I'll like at least as much somewhere!
If you've been reading my blog for any length of time, then you know I WAY prefer making hot process soap over cold process for a variety of reasons. You can read a great comparison (as unbiased as possible) about the differences between cold process and hot process soap, in this article, if you like.
Suffice to say, it takes a little adjusting of cold process recipes to make hot process soaps, mainly due to the amount of liquid used. Sometimes these recipes work, and sometimes not so much. Unfortunately, most soap recipes are geared more toward cold process soap making, but with a little adjusting, things usually work just fine.
Here's my latest experiment I'd love to share with you! This is a recipe I tweaked a little from Jan Berry's A-MAZING book, Simple and Natural Soap Making, AND I've decided to try to get a little more fancy this time by layering two different colors together.
Can you really layer two colors when making hot process soap? The answer is.....YES!
Here's how I layered hot process soap, and my experiences with a new recipe, too!
Note: There are affiliate links (mostly to Amazon) scattered throughout this article. If you click through and make any kind of purchase, I may earn a small commission at no extra cost to you! :-)
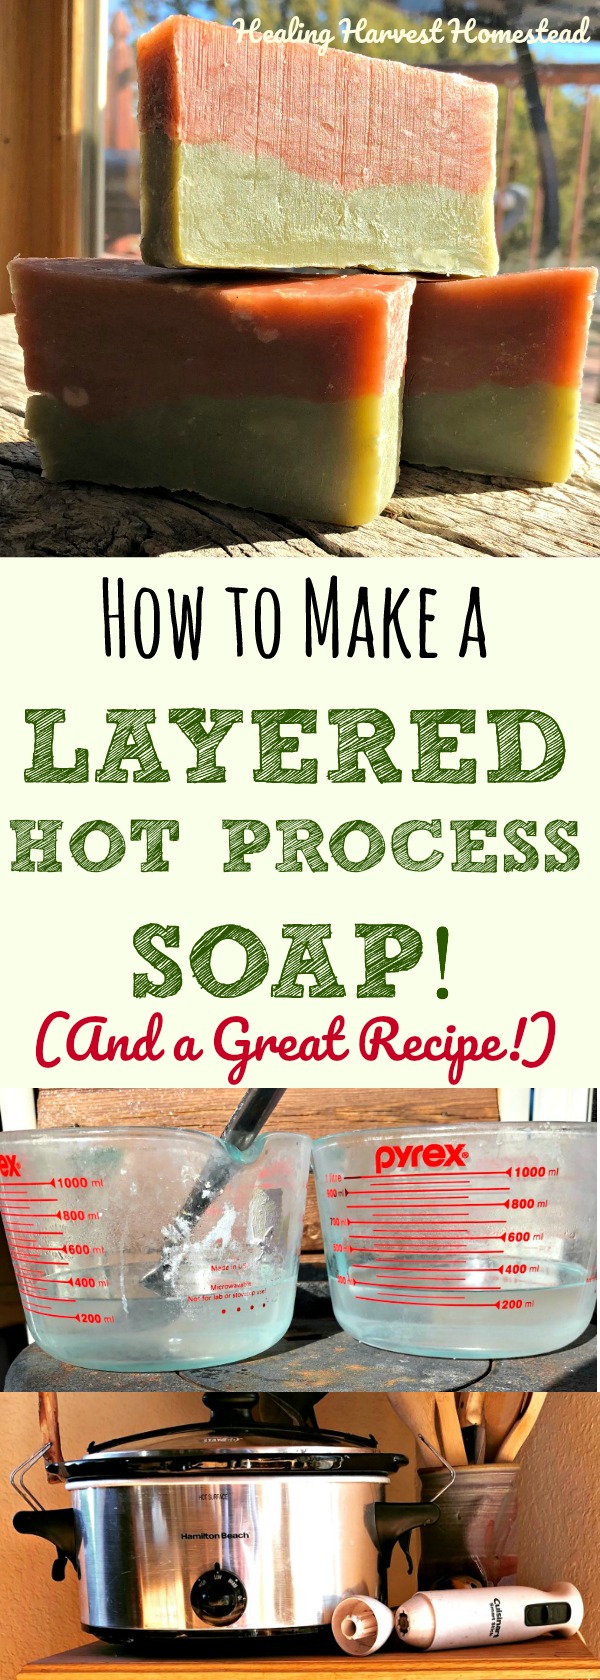
I am on a quest to make hot process soap look more like cold process soap! Yes! Here is a brand new recipe, along with directions how to layer two colors in hot process soap. Beautiful! Easy instructions for layering hot process soap using either one crock pot or two!

Want to learn how to make soap? Click here for the details!
How to Make Hot Process Soap and Layer Two Colors
I'm going to show you the steps I took to layer the two colors, then I'll provide some options for you, in case you don't work with two crock pots, like I do.
My reasoning behind working with two crock pots at a time is very simple: It takes the same amount of work to make two batches of soap at the same time AND I can make two totally different soaps if I want to.
When I decided to layer the soaps, I simply created two different colored soaps, one in each crock pot, for two separate molds. I've also included directions for working with just one crock pot and one soap mold, in case you are only working with one of each.
NOTE: There are quite a few steps in the soap making process. You’ll probably want to get the free Hot Process Soap Making Checklist (which is a life saver, and can be adjusted for cold process too). Just complete the form at the end of the article!
Softening, Soothing Hot Process Soap Recipe with Lavender, Mint, & Pine Essential Oils
NOTE: This recipe is for ONE loaf of soap that yields approximately 2.5 pounds of soap. If you want to use two crock pots and two soap molds to layer your soap, then just make one recipe per crock pot (two batches).
If you are going to just use one crock pot, but still want to layer the soap, then see the directions for layering coming right up--and obviously, you'll just need to make one batch!
For the Lye Solution:
10 ounces distilled water
3.8 ounces sodium hydroxide (lye)
NOTE on the water: I told you this was an experiment, and I adjusted the liquid in the recipe for hot process as directed---HOWEVER, if I make this soap again, I will actually use 9.8 or so ounces of water, as it turned out quite softer--much softer than I like. A very soft soap tends to turn "gooey" when wet.
At any rate, it's always a good idea to run a recipe through a lye calculator, like this one. You might find that the recipe is a little "off" according to the lye calculator, and if that's the case, then you can make a choice which to go with. If you trust the soap maker, I'd go with that person's recommendations. I trust Jan Berry---she's been making soap a LONG time.

Since I use two crock pots at a time, I also use two lye solutions at a time, too! Here they are, waiting to go into the oil mixture!
For the Oil Mixture:
8 ounces coconut oil (I get mine from Costco---or any good grocer)
10 ounces olive oil (Same thing: I have found that Costco, ounce per ounce, has the best price)
4 ounces sweet almond oil
4 ounces castor oil
2 ounces jojoba oil
For the Natural Colorants I Chose:
**In one crock pot, I used 2 tablespoons French Green Clay
**In the other crock pot, I used 2 tablespoons Rose Kaolin Clay
About clay: Clay in soap creates a really nice "slip," when it's completely cured, which makes it a wonderful shaving soap in addition to the other qualities the particular clay brings to the soap.
For the Scent:
I used 1 ounce Peppermint Essential Oil, 1/2 ounce Lavender Essential Oil, and 1 ounce of Pine Scotch Essential Oil PER BATCH/CROCK POT. Now, I love a stronger scented soap, so if you don't like a lot of scent, you can cut back on the amounts of essential oils...you'll save some moulah, too!
A NOTE ABOUT ESSENTIAL OILS: The links above are for Amazon, and I tried to find quantities that would be good for soap making while not breaking the bank. However, please know that I have strong opinions about essential oil quality, and most essential oils are really not that great--especially when purchased in physical stores.
For making soap, my hands-down favorite place to buy essential oils is from Starwest Botanicals. They are still quite reasonable for soap making, and I trust the quality of the essential oils. I actually buy my culinary spices and medicinal herbs there too! LOVE Starwest!
Tools You'll Need for Hot Process Soap Making
A large crock pot (or two, if you want to make more than one batch at a time)
A kitchen scale for accuracy
Heat resistant containers for the lye solution (I love Pyrex pitchers)
Wooden spoons (Never use metal)
Measuring cups
Soap Mold (or two, if you are making a double batch to layer)
Safety Gear: Gloves (I just use rubber gloves) & Safety Glasses

Here's my actual soap making set up! Two crock pots on a double shelf. My neighbor made this for me, and it's pretty perfect. I have to take the bottom crock pot off, though, when it's got soap in it. I just put it on the floor while the soap is cooking!
Directions for Making the Hot Process Soap
These directions are VERY basic, so if you are new to soap making, or are unfamiliar with making hot process soaps, PLEASE read one or both of these articles, as they are complete picture tutorials: Make Hot Process Soap and/or Lavender-Rosemary-Vanilla Hot Process Soap.
You can also purchase my 95 page eBook on How to Make and Customize Your Own Hot Process Soap, which is VERY detailed and contains over 22 recipe variations, charts, and lists, so you can use your own creativity.
Step One: Get your oils measured into the crock pot, and set the crock pot to LOW. I go ahead and add the clay to the oil mixture in the crock pot at this point. **If you are only making one batch, but still want two colors, then do not add the clay right now.
Step Two: While the oils are melting together, measure out your water, then your lye. Pour the lye INTO the water (NEVER the other way around). Set aside in a safe place away from pets and children.
Step Three: When the oils are completely melted, gently pour the lye solution into the oil mixture.
Step Four: Mix to trace with the hand blender. (See the above articles for descriptions of trace.)
Step Five: Cook! Your cooking soap will go through several stages, and you can read more about those in the above links to articles.
Step Six: When the soap is completely cooked (it will be waxy, translucent, a bit like vaseline) turn off the crock pot. After about five minutes (not too long), go ahead and pour in your essential oils. Mix well.
Note: If you are new to hot process soap, please visit the articles above or this one for more details about how to know if your soap is ready and all the lye is cooked out.
**If you are only making one batch of soap, and you still want to layer the soap, then quickly take half the cooked soap, place into a glass bowl. Add one color clay to the soap left in the crock pot, and add the other color to the soap in the bowl. Mix and mix and mix really well.
How to Layer Your Hot Process Soaps
Step Seven: Press the soap into molds.
For the TWO crock pot method, you will need TWO soap molds. Just take the soap from one crock pot and press half into each mold, then take the soap from the other crock pot and layer on top of each mold.
For the ONE crock pot method, take the soap you put aside in the bowl and press into your one soap mold. Then layer the soap from the crock pot on top of the soap in the mold.
It's really important that you press the two layers together--like really SMOOSH them! First of all, you don't want air pockets, and secondly, you want to be sure the two layers adhere well to each other.
Step Eight: Allow the soaps to cool completely (takes several hours or overnight) before you remove them from the mold. After you remove the soaps from the mold and they are completely cool, you can cut into bars or leave in loaf form to cut up as you need.

Here are the layered soaps in the molds. I put the Rose Kaolin Clay color on top. Maybe I should have flip-flopped each one? :-)
A Note on Curing your Soap:
Hot process soap can be used right away! The cure time is not necessary, but allowing your loaves to sit for a week or two can help the soap harden up as more liquid may have a chance to evaporate out. Personally, I don't worry about this, but I know some who do.
Step Nine: Enjoy your natural, handmade hot process soap!
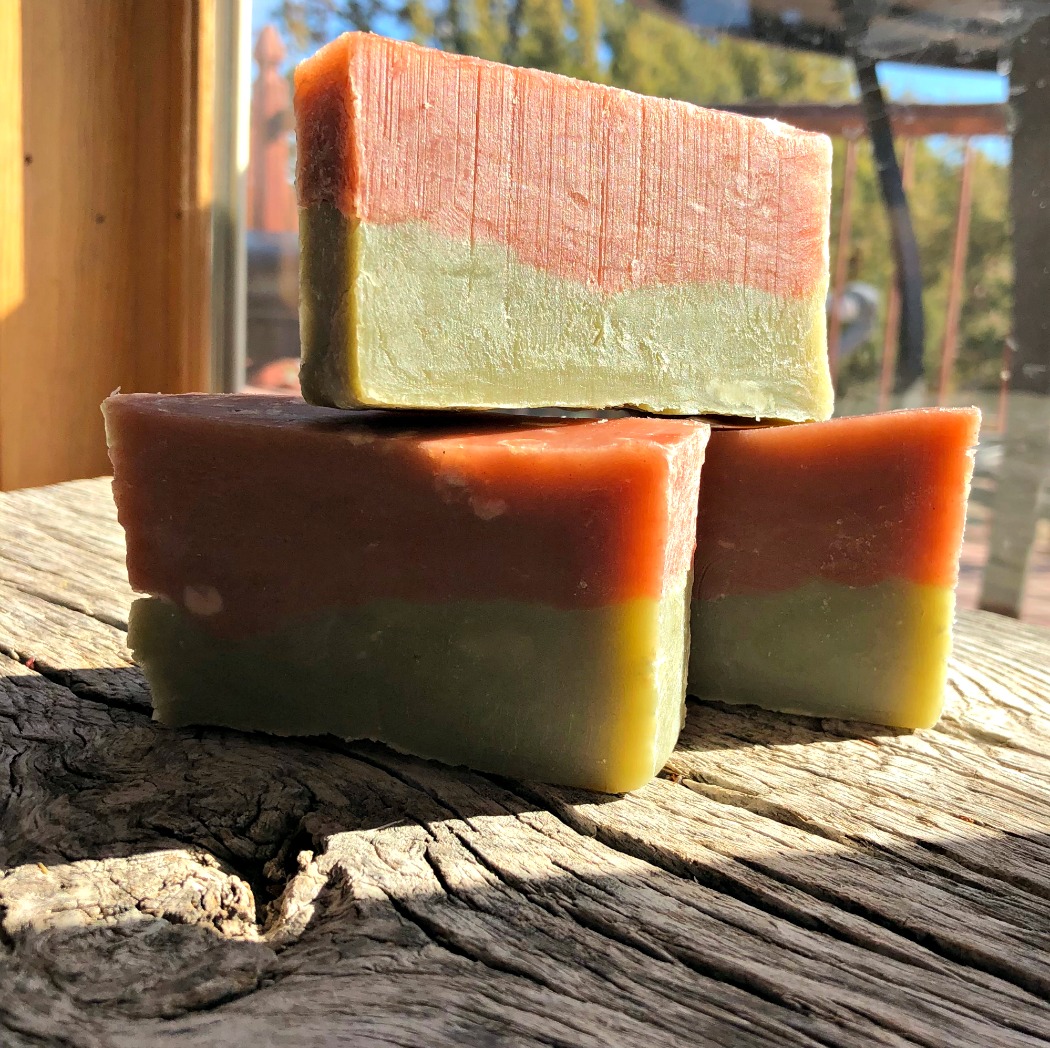
The final products! Quite pretty, if I say so myself. And I can attest to the fact that they are moisturizing, lather great, and smell incredible!
Want detailed instructions for making hot process soap, along with tons of ideas for customizing it? My Hot Process Soap Making eBook will give you the confidence to get started!
Final Thoughts on Layering Soap and Trying a New Recipe:
Well, the layering was a success! Next time, I think I'll try a pencil line, and see how that goes with the hot process method. I really like how this soap turned out, and the colors work beautifully for Christmas!
As far as the actual recipe: This is another very moisturizing hit! Jan creates such wonderful combinations, and all the recipes I've tried so far in her book, Simple and Natural Soap Making, have been terrific. This one turned out much softer than I like, however, and I'm still waiting to see if a few more days of evaporation help due to a little too much liquid (which I suspect), OR whether it may be super-fatted a little too much? Time will tell.
But for now, Mr. V. and I have been using these soaps and enjoying the heck out of them! They are going to be small and fun gifts for family members that show up this weekend, too! :-)
You know what I just love about giving handmade soaps as gifts? It's watching people feel and smell them! I just always get a kick out of this! If you create a great fragrance blend with essential oils, many people love the aromatherapy benefit from the natural plant oils so much they just can't stop smelling! Makes me laugh (inwardly) every time! :-)
Do you make soap? If you don't have any desire to try, why not? I'd love to know your thoughts! I know some people are really afraid of the lye (heck, I was one of those people!), but my book, Hot Process Soap: How to Make and Customize Your Own Natural Soap, will give you the confidence you need to get started! And once you start, the sky is seriously the limit!
Leave comments, questions, and musings in the comments section---
Hugs & Self-Reliance,
Heidi
P.S. I hope you'll sign up for the weekly newsletter! When you do, you’ll get my free Hot Process Soap Making Checklist (a real life saver) PLUS access to the free Resource Library. The Library contains eBooks, guides, checklists, and more on the topics I write about on the blog. I created it just for you! Sign up below: