
How to Make Lacto-Fermented Dilly Green Bean Pickles
When the green beans are ready to harvest, it’s a great day! While many people love canning green beans and making lovely pickled dilly beans that way, I love fermenting my beans and creating the MOST healthy dilly bean pickles ever. Lacto-fermenting your green beans is an excellent option for preserving them, and it only takes a few days on the counter!
Updated May 15, 2022…..
When those beans come in, it’s like a flood, isn’t it? When there’s a LOT of beans, I like to get them used or preserved in some manner quickly. If I have too many, I’ll go ahead and freeze them for later….but I ALWAYS make a delicious batch of lacto-fermented dilly beans.
I love fermentation. It's a way to make your food last a lot longer (sometimes months), while increasing the nutritional value too. Amazing. Plus, fermented foods taste delicious! Here’s more information about fermentation and its benefits.
As a survival option, learning to ferment foods can increase your food’s shelf life, even if you don’t have a refrigerator, too.

Is all the crazy in the world stressing you out? Click HERE, and I’ll send your copy of How to Relax using Herbs and Oils straight to your inbox! Filled with tips and herbal recipes, you’ll be finding peace fast!

Have too many green beans to use up? Need to use them fast? Don't feel like canning? Here's my recipe for Spicy Fermented Green Beans! Fermentation is a great option as a food preservation method. Here's how to ferment green beans for a delicious snack or addition to your cooking!
FTC Disclosure: There are affiliate links scattered throughout this article. If you click through and make any kind of purchase, I'll receive a very small commission at no extra cost to you!
Here's My Recipe for Spicy Fermented Green Beans
This recipe is extremely flexible! You can change up the spices for different flavors, so if you don’t like dill or spicy peppers that’s fine! Leave them out and substitute with your own favorite flavors.
Ingredients & Tools for Fermented Spicy Green Beans:
Fresh green beans, cut into 2 to 4 inch lengths
Peppers (cayenne, jalapeno, habanero, or any hot pepper)
Garlic, about 1 tablespoon, and any other spices you want to add (Dill is a great choice.)
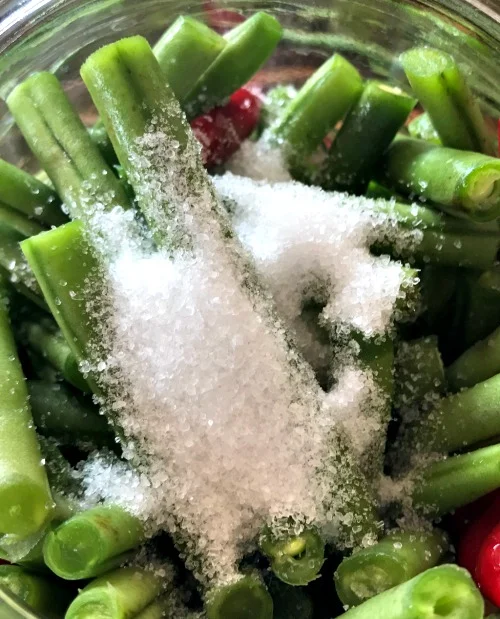
Sea Salt, 1 1/2 tablespoons per four cups water
Starter Culture (optional---see more below)
Water: Filtered or distilled is best if you’re on city water. We just use our well water, as it’s untreated.
Fermentation weight of some type, to keep the beans under the surface
Silicone airlock (optional…see directions below)
Directions for Making Spicy Fermented Green Beans:
Step 1) Get your ingredients ready
Quick Note on the Starter Culture:
First, what is a starter culture in lacto-fermentation?
In essence a good starter culture will give your lacto-fermented veggies a head start in the fermentation process and shorten the time until you can eat your dilly beans! Using a starter culture also reduces the potentiality of mold growing or something else going on. Here are my two favorite options you can use:
1) Whey: Whey is a by-product from cultured dairy products such as plain yogurt. It’s full of protein, and also full of lacto-bacilli and other helpful probiotics!
2) Leftover liquid from previous raw lacto-ferments, either homemade or from the grocery store is another simple option. If these are truly raw, the liquid will contain probiotic bacteria and yeasts that can super-charge your lacto-ferment. Be sure the flavors match up somewhat.
For making these spicy green beans, I used some liquid from my recent fermented hatch peppers (see picture). You only need about 1/4 cup or so per quart mason jar. You can use a little less if you like, too.
If you don't have liquid from a previous fermented batch or whey, that's ok. Just add an extra half tablespoon to full tablespoon of salt per quart size jar. The salt helps keep any bad bacteria out of your ferment, while allowing the good yeasts and bacteria to still do their thing! Pretty cool, right?

Here's the ingredients--except I left out the garlic! See the jar of pepper rings in the Mason jar? Those are already fermented. I'm using about 1/4 cup of that liquid to help the green beans get started, since I don't have any whey at the moment.
Step 2) Add All to Mason Jar
The best way to get your green beans into your Mason jar neatly is to lay the jar on its side, then pack your green beans in. They'll mostly be vertical this way, and it looks nice too.
I add the starter culture first, then any sea salt, then fill the jar with water until the green beans are just covered.
NOTE: You can also make a brine by combining your water and salt together first and stirring until the salt is fully dissolved. Then you’ll use this brine to fill your jars. I’ve made these both ways, and it’s fine. I love flexible processes like fermentation!
Here we go: all ready to add the water!
Step 3) Weight and Airlock System
You must be sure to weigh down your vegetables so they all remain under the surface of the liquid. Otherwise, you risk mold forming. I had that happen once, and you can read about it in this article---It's NO fun!
You can use a fancy fermenting weight, but if you don't have one, just boil a few rocks or add a plastic bag filled with water. If you’re using a larger mouthed crock, you can even use a bowl! You can get pretty creative with your weights, as long as those veggies stay put.
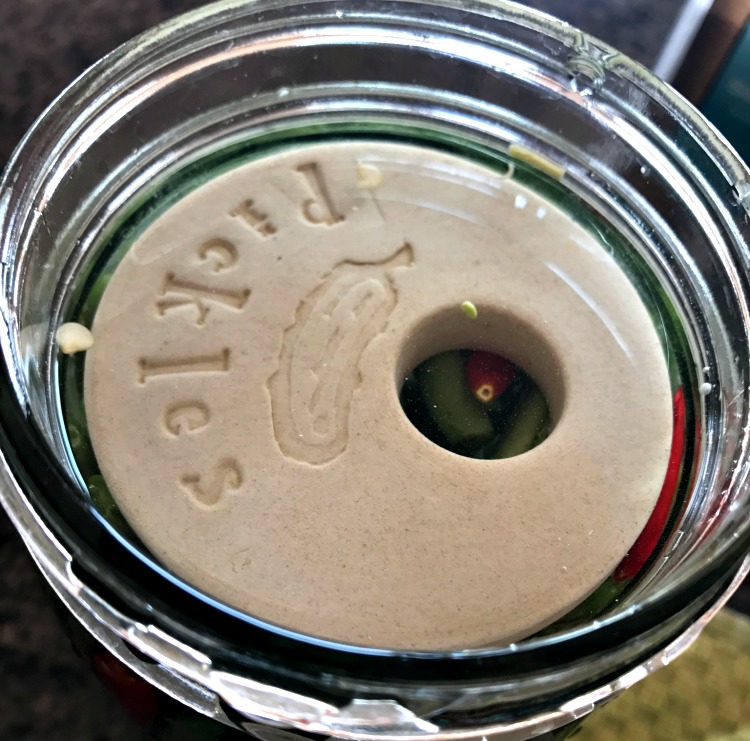
As far as the airlock goes, I love these silicone pickle pipes with the nipple at the top. They allow the gases to release so I don't have to "burp" my jars. However, they are optional. You can use a regular Mason jar lid---just plan to open the lid very slightly once or twice a day to "burp" it. You are releasing the gases from the jar so they don't build up and potentially explode.
Here's a fermentation weight holding down the veggies. The weights in the links are glass, which I feel are more sterile than the ceramic ones I have. I keep meaning to get some!
Step 4) Ferment
Place your jar in a safe, undisturbed place. Your veggies will most likely be ready after about seven days, but I have left mine for a month before, and it's all good.
What you can expect to see as your veggies ferment:
First, don't be worried if you notice that the liquid gets cloudy. That's normal and a good thing.
Second, you'll be seeing little bubbles rising to the top of the jar, as the fermentation process gets going. These are little gas bubbles that will be released out of the airlock system or when you burp the lid.
Third, your vegetables will change color a bit. They usually become a little less bright. As the fermentation process continues, they'll also soften a little. However, if they are a crunchy type vegetable, like green beans, they will retain some nice crispness.

Here they are, ready to begin their fermentation journey with the end in mind being my tummy….Mmmmm

Don’t forget to click here so I can send you this 24 page book chock full of tips and recipes using herbs and essential oils so you can relax and have more energy!
Final Thoughts on Making Fermented Green Beans
Got too many veggies, and you need to use them up right away? Fermentation is a healthy, fast option! Not only will you preserve your food longer, you'll be providing your body with tons of healthy probiotics as well as extra nutrition. Win!
These spicy green beans can be used in salads, as garnishes, or even in your cooking. Just toss them into the crock pot at the end of the cooking period, or add them to scrambled eggs! Delicious! You can also eat them as a great snack!
If you’re intrigued with lacto-fermentation, then you might also be interested in these related articles:
How to Ferment Lemons with Two Delicious Recipes
Incredible Fermented Cranberries for the Holidays
How to Make Fermented Cherry Tomato Bursts—-SO Yummy!
Make Homemade Fruit Vinegars….These are Amazing!
How to Make Easy Sour Dough Gourmet Tortillas with Rosemary
Here’s an older YouTube video on Making Fruit Vinegar….be sure to watch the newer videos, as they’re a LOT better made. LOL
How to Cook Beans from Scratch (Also a YouTube video)
Make a Healthier Bone Broth with Immune Boosting Herbs (video)
And there are literally hundreds more articles on my website and YouTube channel too!
Enjoy!
Hugs, Health, & Self-Reliance,
Heidi
P.S. I have a FREE gift for you! Be sure get your free book on how to use herbs and essential oils for stress management, relaxation and get better sleep and more energy! Click here and I’ll send your copy to your inbox now. You’ll also receive my weekly notes with additional natural living tips. Don’t like these? That’s ok, you can unsubscribe with one button click!
Be sure to get your copy of this 24 page book with recipes so you can start dealing with this stressful world better now! Just click here.
Disclaimer: I’m not a medical doctor; I’m a certified herbalist and aromatherapist. The FDA doesn’t evaluate herbal information, and any statement made by me is for information only and not meant to treat, cure, diagnose, or prevent disease.